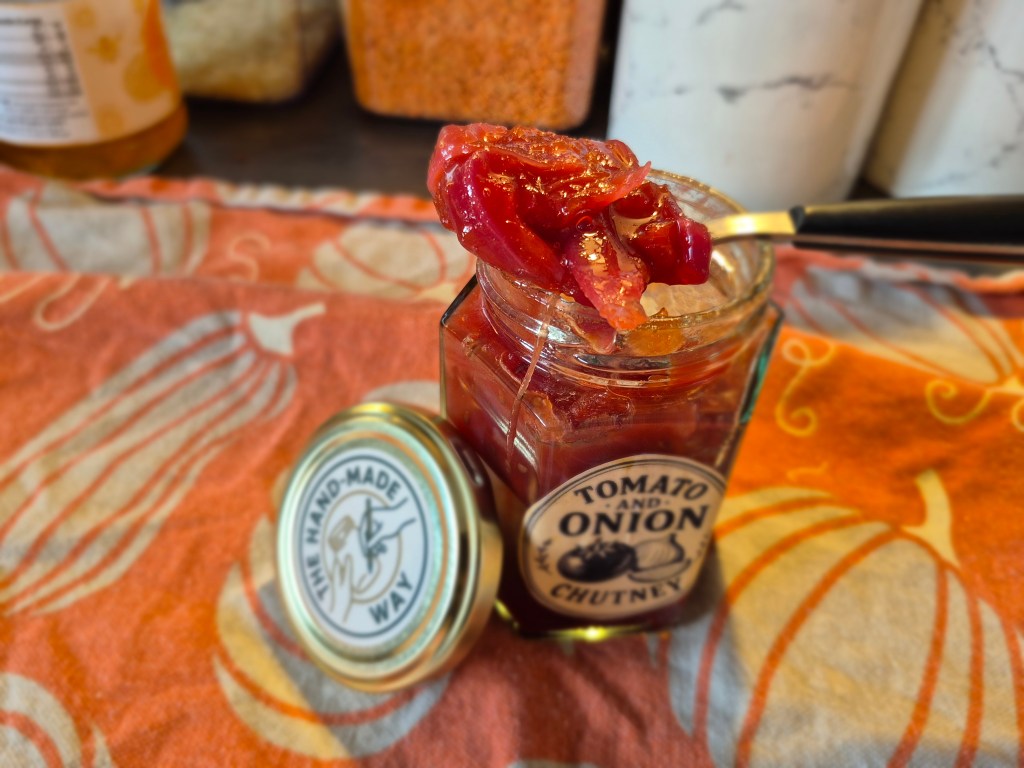
There’s something very satisfying about making a proper homemade chutney.
It starts with a few simple ingredients — tomatoes, onions, vinegar, sugar, and a handful of spices — and slowly turns into something rich, glossy, sweet, tangy, and genuinely useful. The kind of thing you can spoon onto a cheeseboard, spread into a sandwich, serve with sausages, or add to a ploughman’s-style lunch.
This homemade tomato and onion chutney is exactly that sort of recipe. It is simple, practical, and made with everyday ingredients. There are no complicated spice blends and no unnecessary extras. The tomato flavour is still the main event, with the onion adding sweetness and depth, and the vinegar and sugar giving it that classic chutney balance.
If you are new to making UK preserves, this is a great place to start. It is a small batch chutney recipe, so you do not need a huge preserving pan or mountains of produce. It is ideal if you have a few spare tomatoes from the garden, a glut from the allotment, or just want to make something homemade for the cupboard.
Why Make Tomato and Onion Chutney?
Tomato chutney is one of those preserves that earns its place in the cupboard because it goes with so many things.
It works beautifully with cheese and crackers, especially a mature cheddar. It is lovely in sandwiches, particularly with ham, cheese, cold meats, or leftover roast pork. It can be served with sausages, burgers, pork pies, cooked breakfasts, jacket potatoes, or even used as a quick flavour boost alongside simple meals.
For me, that is the real appeal of chutney. It is not just something you make once and forget about. It is something you actually use.
This tomato and onion chutney keeps the ingredients simple so the tomatoes still shine through. Some chutneys can become very spice-heavy, which is lovely in its own way, but this version is designed to be more everyday and versatile. It has sweetness, acidity, a little warmth, and plenty of rich tomato flavour.
It also makes a great homemade gift. A jar of chutney with a simple label and a bit of string or fabric around the lid looks thoughtful without being fussy. It is especially good around autumn, Christmas, or at the end of the growing season when tomatoes are everywhere.
Ingredients
This is a small batch recipe, ideal for a few jars.
You will need:
- 1 kg tomatoes, roughly chopped
- 500 g Red onions, finely sliced
- 150 ml Red Wine Vinegar
- 300 g white granulated sugar
- 1 tsp salt
- 4 cloves garlic minced or diced
This should make roughly 5 to 6 small jars (190ml), depending on how much the chutney reduces and the size of your jars.

Equipment
You do not need much specialist equipment for this recipe.
You will need:
- Large heavy-based pan
- Wooden spoon or silicone spatula
- Chopping board and knife
- Sterilised jars and lids
- Ladle or jam funnel. I reccommend this kit: https://amzn.to/4d0dqYK
- Labels, if gifting or storing
A wide pan is useful because it helps the chutney reduce more efficiently. A heavy-based pan also helps stop the chutney from catching on the bottom as it thickens.
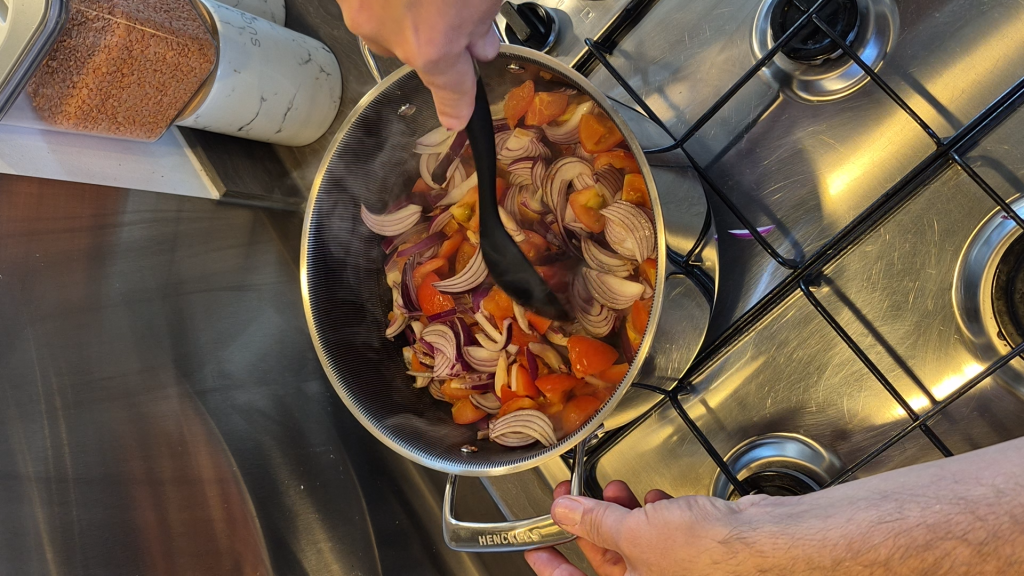
Step 1: Prepare the Tomatoes and Onions
Start by washing and roughly chopping the tomatoes. You do not need to be too precise here because the tomatoes will break down during cooking. If you prefer a smoother chutney, you can chop them smaller, but I like a bit of texture.
Next, peel and slice or chop the onions. Again, this depends on the texture you want. Finely chopped onions will almost melt into the chutney, while sliced onions will give you more visible strands and a slightly chunkier finish.
Add the tomatoes and onions to your large pan. If you are using garlic, add that now as well.
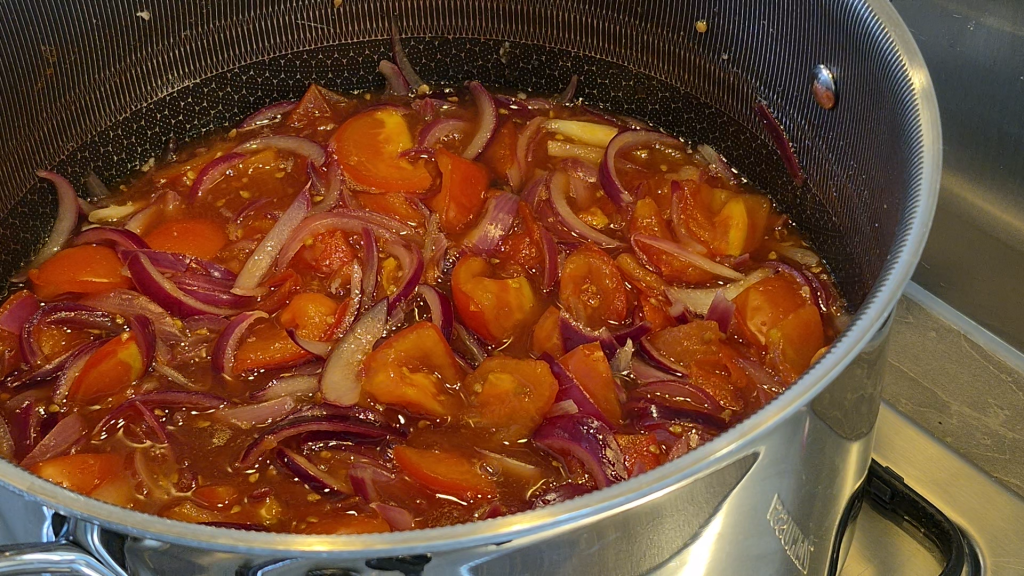
Step 2: Add the Vinegar, Sugar and ‘Spices’
Add the vinegar, sugar and salt. And thats IT! Yes, the salt was the ‘Spices’.
At this stage, the pan may look very full and quite watery. That is completely normal. Chutney starts off loose and liquid because the tomatoes and onions release a lot of moisture as they cook.
Give everything a good stir to combine. Place the pan over a medium heat and bring the mixture up to a gentle simmer. Stir regularly while the sugar dissolves.
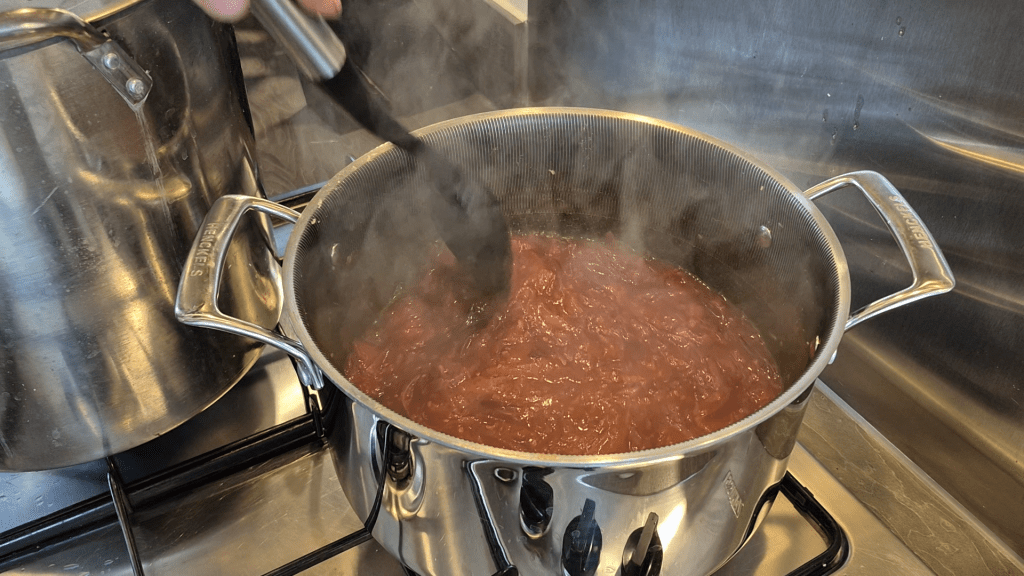
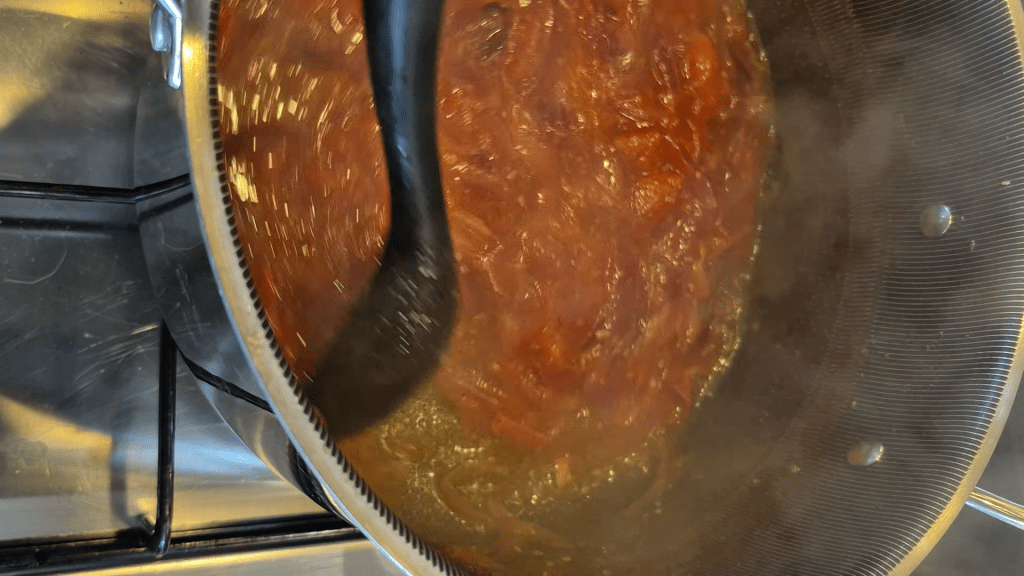
Step 3: Simmer Slowly
Once the sugar has dissolved, bring to boil but ONLY Briefly; 1-2 minutes. After this, reduce heat and let the chutney come to a simmer, leaving to let it cook gently.
This is where patience matters.
You do not want to boil it aggressively. A steady, gentle bubble is enough. The aim is to reduce the liquid slowly, soften the onions, break down the tomatoes, and develop the flavour.
Stir the chutney regularly, especially as it starts to thicken. Early on, you can leave it for a few minutes at a time, but towards the end you will need to stir more often to stop it catching on the bottom of the pan. The thicker your pans bottom, the more forgiving it will be!
The cooking time will vary depending on your pan, heat level, and the water content of your tomatoes, but expect it to take around 30-40minutes.
It may feel slow at first, but this is the stage where the chutney becomes rich, sticky, and full of flavour.
Step 4: How to Know When Chutney Is Ready
This is the part that can worry people when making chutney for the first time.
You are looking for a thick, glossy texture. It should be spoonable, not watery. One simple test is to drag a large spoon through the chutney across the base of the pan. If it briefly leaves a clear trail before the chutney slowly comes back together, it is usually ready.
You do not want to cook it until it is dry or paste-like. It will thicken a little more as it cools, so stop when it is thick, glossy, and still slightly loose.
The colour should also deepen as it cooks. The tomatoes will darken, the sugar and vinegar will create that chutney richness, and the onions should be soft and fully cooked.
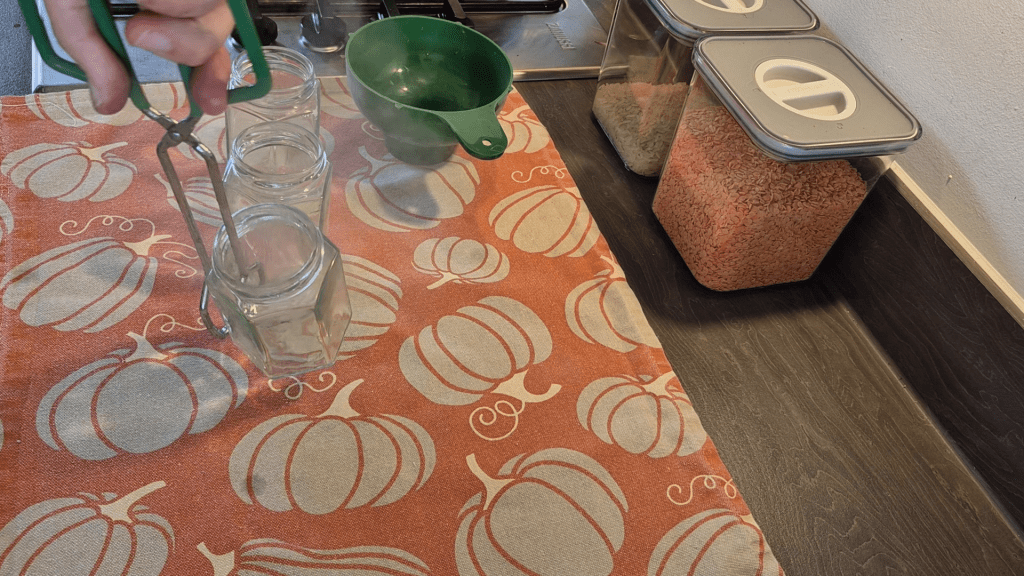
Step 5: Sterilise Your Jars
While the chutney is finishing, prepare your jars.
Wash the jars and lids in hot soapy water, rinse well, and sterilise them using your preferred method. You can sterilise jars in the oven or dishwasher, depending on what you usually do. The important thing is that the jars are clean, sterilised, and warm when the hot chutney goes in. I personally advocate boiling water.
Avoid putting hot chutney into cold jars, as the sudden temperature change can cause glass to crack. If reusing jars, check that the lids are in good condition and have no rust, dents, or damage. For preserves, it is often best to use new lids where possible.
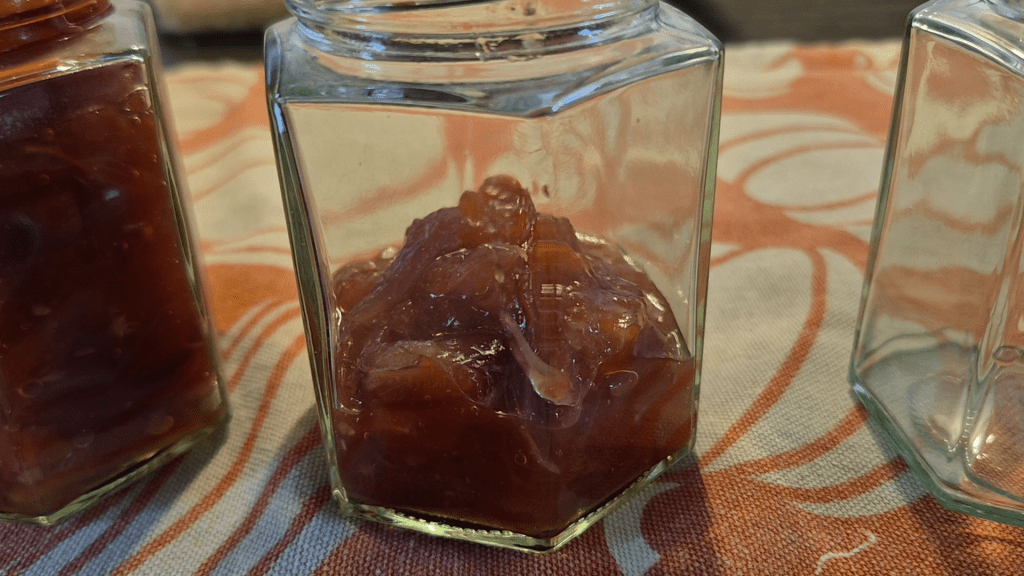
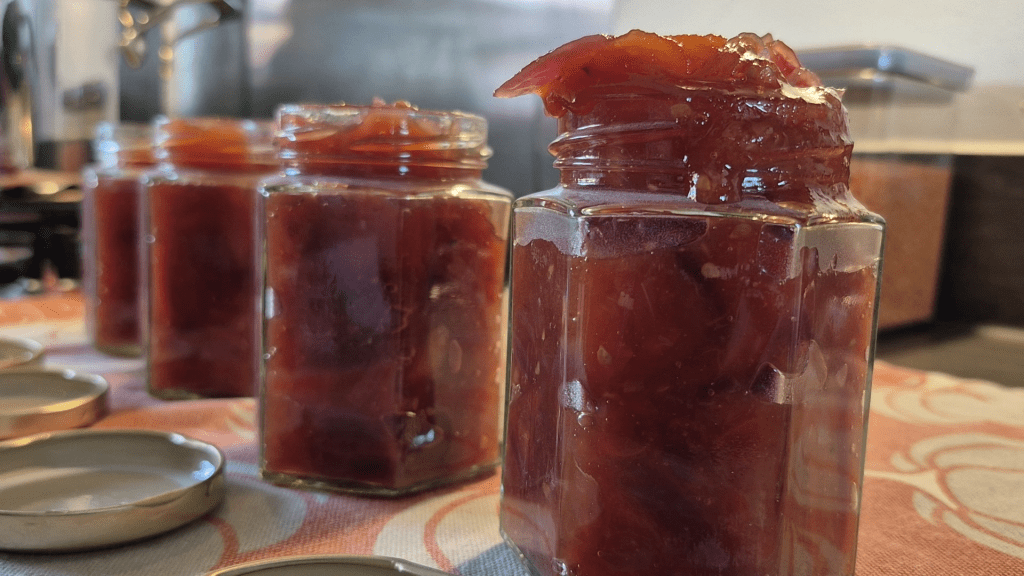
Step 6: Jar the Chutney
Carefully spoon or ladle the hot chutney into the warm sterilised jars. A jam funnel makes this much easier and helps keep the rims clean.
Fill the jars, leaving a small headspace at the top. Wipe the rims with a clean cloth if needed, then seal with clean lids while the chutney is still hot.
As the jars cool, you may hear the lids pop down as they seal.
Label the jars with the name and date. This is especially useful if you make a few different preserves throughout the year.
Step 7: Let the Chutney Mature
You can eat the chutney straight away, but it is much better if you let it mature.
Chutney often tastes quite sharp when it is first made because the vinegar is still very forward. After a few weeks, the flavours settle, soften, and come together.
Ideally, leave the jars for at least 2 to 4 weeks before opening. If you can wait longer, even better.
Once opened, keep the chutney in the fridge and use a clean spoon each time.
How to Use Tomato and Onion Chutney
This tomato and onion chutney is very versatile. Try it with:
- Mature cheddar and crackers
- Cheese toasties
- Ham or cheese sandwiches
- Sausages
- Burgers
- Pork pies
- Ploughman’s lunch
- Jacket potatoes
- Cold meats
- Cooked breakfasts
It is also lovely on a simple cheeseboard, especially if you are putting together something homemade for guests.
Storage
Store sealed jars in a cool, dark cupboard.
Once opened, keep the jar in the fridge and use within a few weeks.
Always check preserves before eating. If a jar shows signs of spoilage, mould, fizzing, leaking, an unusual smell, or anything that seems wrong, do not eat it.
Homemade Tomato and Onion Chutney Recipe
Ingredients
- 1 kg tomatoes, roughly chopped
- 500 g Red onions, finely sliced
- 150 ml Red Wine Vinegar
- 300 g white granulated sugar
- 1 tsp salt
- 4 cloves garlic minced or diced
Method
- Wash and chop the tomatoes, then add them to a large heavy-based pan.
- Peel and slice or chop the onions, then add them to the pan with the tomatoes.
- Add the vinegar, sugar, salt and garlic if using.
- Stir well and bring the mixture to a short boil for 1-2minutes.
- Reduce the heat and cook gently for around 40minutes, stirring regularly.
- Continue cooking until the chutney is thick, glossy, and a spoon dragged through the pan briefly leaves a clear trail.
- Spoon the hot chutney into warm sterilised jars.
- Seal, label, and leave to cool.
- Store in a cool, dark cupboard and allow to mature for 2 to 4 weeks before opening.
- Once opened, keep in the fridge.
Final Thoughts
Tomato and onion chutney is one of those simple homemade preserves that is well worth making. It does not need complicated ingredients, and it does not need to be intimidating. With tomatoes, onions, vinegar, sugar, and a little time, you can make something that feels genuinely useful.
For me, this is exactly what The Handmade Way is about: taking simple ingredients, learning practical skills, and making something for the cupboard that you will actually use.
Whether you are using up garden tomatoes, making a few jars for gifts, or just trying homemade chutney for the first time, this is a brilliant recipe to start with.
Serve it with cheese, spoon it into sandwiches, add it to a cooked breakfast, or put it on the table whenever a meal needs something sweet, sharp, and homemade.
Want to download the label? Get that here:
Tomato and Chutney Labels Free Download
Want to watch it being made? Watch the video here:
